Diagnostic Video#
Creating time-lapse videos from sequences of night sky images is a powerful diagnostic tool for astronomers. Such videos can reveal evolving patterns in seeing conditions, tracking accuracy, cloud coverage, and equipment performance—details that may be missed when examining individual frames.
In this tutorial, we will transform the calibrated astronomical images from the calibration tutorial into a time-lapse video of the night.
Selecting and Sorting Files#
Let’s begin by retrieving the files.
from glob import glob

images = glob("calibrated_images/*.fits")
Next, we sort the files by observation time.
from astropy.io import fits
from dateutil import parser


def observation_time(file):
    date_str = fits.getheader(file)["DATE-OBS"]
    return parser.parse(date_str)


# order by observation time
images = sorted(images, key=lambda file: observation_time(file))
Creating a Video in the Notebook#
We will now define a small function to display an image along with some relevant information.
This function will be used to visualize individual frames.
import matplotlib.pylab as plt
from eloy import viz
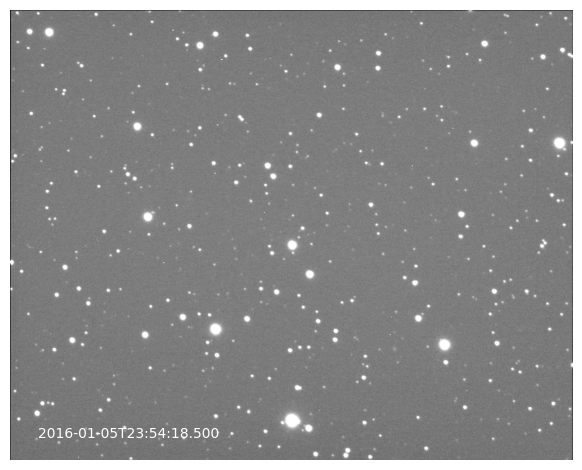
def show_image(file, ax=None):
data = fits.getdata(file)
header = fits.getheader(file)
if ax is None:
ax = plt.gca()
ax.imshow(viz.z_scale(data), cmap="Greys_r", origin="lower")
ax.text(
0.05, 0.05, header["DATE-OBS"], color="white", transform=plt.gca().transAxes
)
ax.axis("off")
plt.gcf().patch.set_alpha(0.0)
plt.tight_layout()
show_image(images[0])
Let’s use this function to create a video of the night directly in the notebook. For demonstration purposes, we’ll use only the first \(n\) images.
import matplotlib.animation as animation
from IPython import display
import imageio.v2 as imageio
import io

FPS = 10
fig, ax = plt.subplots()


def init():
    show_image(images[0], ax=ax)
    im = fig.axes[0].images[0]
    return [im]


def update(frame):
    ax.clear()
    show_image(images[frame], ax=ax)
    return [ax.images[0]]


ani = animation.FuncAnimation(
    fig, update, init_func=init, frames=10, interval=1000 / FPS, blit=True
)
video = ani.to_jshtml(embed_frames=True)
html = display.HTML(video)
plt.close()
display.display(html)
Saving the Video Locally#
To save the video locally, we use this matplotlib feature, which requires ffmpeg to be installed.
ani.save("night_video.mp4", writer="ffmpeg")
plt.close()
Creating Videos in a Pipeline#
It is common to generate plots and save videos while performing other tasks on each image within a processing loop. For this purpose, the imageio library is especially convenient. Here, we define a function that writes a matplotlib plot directly into an imageio writer.
Note
For this part, you will need to install imageio with
pip install "imageio[ffmpeg]"
def write_plot(writer):
    buf = io.BytesIO()
    plt.savefig(buf)
    writer.append_data(imageio.imread(buf))
    plt.close()
Now, let’s create a loop in which we perform some image processing tasks while generating a video based on a plot.
Note how the writer is instantiated before the loop and closed at the end.
import numpy as np
from eloy import utils, detection, viz


writer = imageio.get_writer("night_video.mp4", mode="I", fps=10, format="FFMPEG")

for file in images[10:30]:
    data = fits.getdata(file)  # load the data to avoid caching issues

    # as an example we make a cutout of the image and display some detected stars
    cutout = utils.cutout(data, [(1000, 500)], (300, 300))[0]
    regions = detection.stars_detection(cutout, threshold=1)
    coords = np.array([r.centroid_weighted[::-1] for r in regions])

    # the plotting part
    plt.figure(figsize=(4, 4))
    plt.imshow(viz.z_scale(cutout), cmap="Greys_r", origin="lower")
    viz.plot_marks(*coords.T)
    plt.tight_layout()

    write_plot(writer)

writer.close()
Here is the generated video.
from IPython.display import Video

Video(
    "night_video.mp4",
    embed=True,
    width=600,
    height=400,
    html_attributes="controls autoplay loop",
)